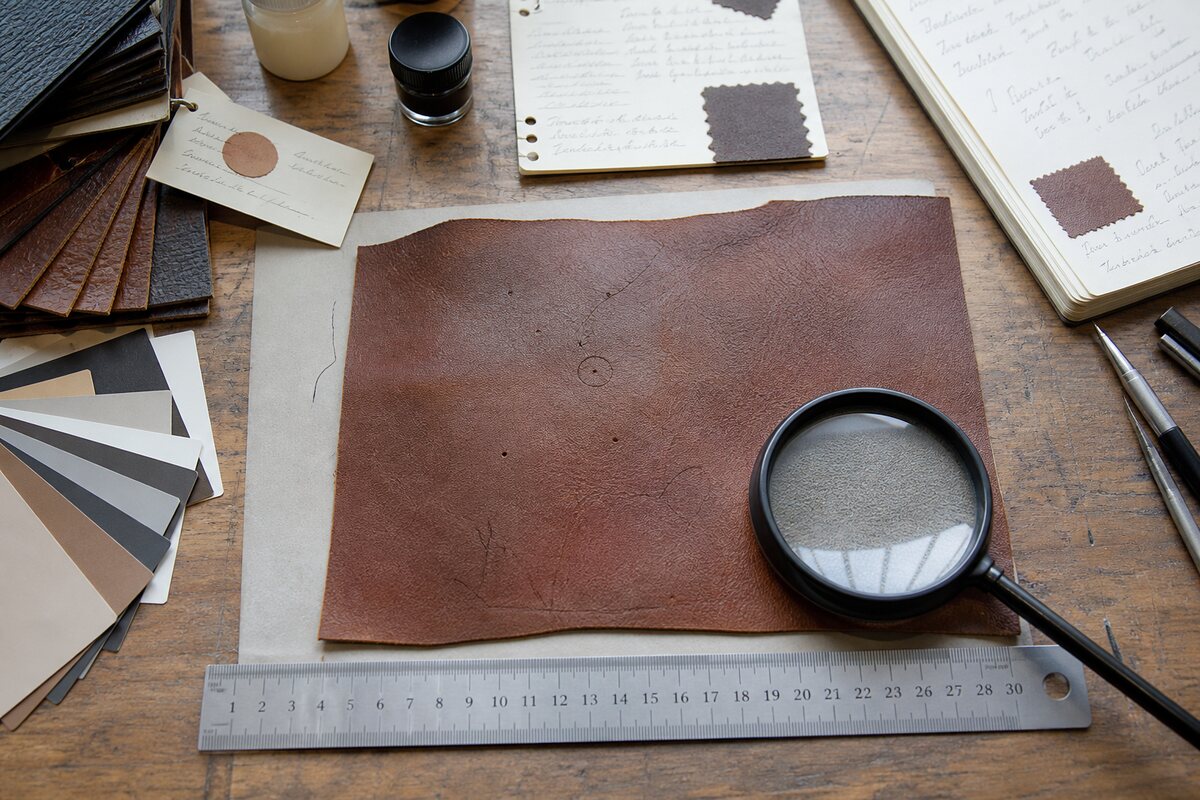
01Aniline leather
Fresh water mark or soft tide line
- Finish
- Minimal transparent finish
- Application
- Sofa or lounge chair
- Difficulty
- High appearance risk
What to observe. Color darkens through the grain rather than sitting as a removable film. The edge can grow while damp and may soften as it dries.
Least-risk next step. Blot excess without rubbing, support the panel in shape, allow natural drying and compare the dry result with a sheltered area.
Avoid. Heat, wetting a larger circle to disguise the edge, household detergent and repeated local scrubbing.
Stop condition. Escalate if color transfers, a sharp ring remains after drying or the item has historic or high-value significance.
Open the full field guide
02Aniline leather
Pale handling scratch
- Finish
- Open or lightly waxed surface
- Application
- Chair, bag or desk leather
- Difficulty
- Medium
What to observe. The line changes with viewing angle and may soften when the surrounding leather is flexed because oils or waxes shift within the surface.
Least-risk next step. Photograph under raking light, check whether the line opens and identify any maker-approved method before applying product.
Avoid. Pigmented shoe polish, sanding, hard rubbing and trying to make natural variation completely uniform.
Stop condition. Treat it as a cut, not patina, if the edge catches, separates or exposes a lower layer.
Open the full field guide
03Semi-aniline leather
Dark body-oil zone
- Finish
- Light protective finish
- Application
- Sofa arm or headrest
- Difficulty
- Medium to high
What to observe. Darkening follows repeated skin contact and often has a soft boundary. The nearby sheltered finish may retain a lower, more even sheen.
Least-risk next step. Record use and prior products, then test only a maker-approved mild cleaner on an intact hidden area and judge it dry.
Avoid. Strong degreaser, flooding the grain and hiding the patch immediately under conditioner or color.
Stop condition. Professional assessment is appropriate when the dark area remains absorbed, the finish moves or previous oils are unknown.
Open the full field guide
04Semi-aniline leather
Localized color rub
- Finish
- Light pigment and transparent top finish
- Application
- Frequently used cushion
- Difficulty
- Professional finish matching
What to observe. A touch point becomes paler without an opening crack. Grain remains present, but sheen and color no longer match the sheltered panel.
Least-risk next step. Separate removable soil from stable coating loss with a small controlled clean, then set a color and patina standard for refinishing.
Avoid. Opaque spot paint chosen from a wet color chip and broad cleaning after color begins to transfer.
Stop condition. Move to repair scope if the pale area is weak, fibrous or opens during ordinary flex.
Open the full field guide
05Pigmented leather
Gray surface soil
- Finish
- Intact protective color coat
- Application
- Family sofa
- Difficulty
- Low when identity is confirmed
What to observe. Soil collects in grain recesses and at contact zones while a hidden section keeps the intended color. A dry white cloth shows dirt but not finish color.
Least-risk next step. Follow current maker guidance, use a mild compatible cleaner in small sections, remove residue and compare only after drying.
Avoid. Abrasive pads, soaking seams, unlabelled wipes and increasing pressure when the coating starts to move.
Stop condition. Stop at color transfer, tackiness, exposed substrate or cracking that becomes clearer during cleaning.
Open the full field guide
06Pigmented automotive leather
Fine cracks with clothing transfer
- Finish
- Flexible color and topcoat system
- Application
- Driver-seat bolster
- Difficulty
- Medium to specialist
What to observe. Dark transfer follows the entry arc while pale cracks align with flex. Some lines stay within coating; deeper ones expose another layer.
Least-risk next step. Map transfer and cracks separately, test away from seams and perforations, and document the panel systems before repair.
Avoid. Aggressive rubbing, household conditioner and DIY work near airbags, sensors, heating or ventilation.
Stop condition. Qualified trim inspection is required when a split opens, stitching pulls, foam shows or a safety system enters the panel.
Open the full field guide
07Pigmented upholstery leather
Front-edge abrasion
- Finish
- Durable contract coating
- Application
- Restaurant dining chair
- Difficulty
- Program-level decision
What to observe. Wear repeats across the same contact edge on several chairs and may combine pale color loss with a polished cleaning band.
Least-risk next step. Number chairs, map use and cleaning, define an acceptable appearance standard and trial one controlled repair before treating the set.
Avoid. Set-wide recoloring before the cause is mapped and treating a loose seam as cosmetic edge wear.
Stop condition. Remove a chair from service when material opens, a fixing is exposed or support becomes unstable.
Open the full field guide
08Pigmented automotive leather
Gloss, tack or worn grain
- Finish
- Low-slip steering-wheel finish
- Application
- Steering-wheel rim
- Difficulty
- Safety-sensitive
What to observe. Change follows hand positions. It may include compacted residue, polished coating, color transfer or flattened printed grain.
Least-risk next step. Compare with a sheltered lower rim, use a tiny approved cleaning test and assess grip only when fully dry and stationary.
Avoid. Oil, wax, slippery dressing, coating over loose stitching and any work around an airbag component.
Stop condition. Escalate if the cover moves, stitching opens, controls are affected or the dry surface remains tacky or slick.
Open the full field guide
09Nubuck
Water mark and flattened nap
- Finish
- Buffed grain with fine nap
- Application
- Upholstered chair
- Difficulty
- High appearance risk
What to observe. The patch changes with fiber direction, but a tide edge remains visible from several angles after natural drying.
Least-risk next step. Photograph before brushing, use only an appropriate clean brush gently, and follow material-specific maker guidance.
Avoid. Smooth-leather cream, wax, hard localized brushing and making the whole panel wet to chase the ring.
Stop condition. Use a specialist when the tide line persists, fibers transfer, color changes or the affected face is highly visible.
Open the full field guide
- Finish
- Absorbent raised nap
- Application
- Bag, cushion or armrest
- Difficulty
- Specialist
What to observe. The area remains darker through the nap, has a soft spreading edge and does not reverse simply when fibers are lifted.
Least-risk next step. Stop handling, record the substance and time, preserve the item dry and obtain a napped-leather cleaning assessment.
Avoid. Water-based home remedy, heat, talc rubbed into the grain and repeated solvent experiments.
Stop condition. Immediate referral is sensible for large, old, colored or historically important stains.
Open the full field guide
11Suede
Compressed shiny patch
- Finish
- Flesh-side or split nap
- Application
- Loose cushion or accessory
- Difficulty
- Medium
What to observe. Fibers lie flat along a repeated touch direction and the patch changes appearance when viewed from opposite sides.
Least-risk next step. Remove loose dust with an appropriate clean brush, then compare fiber lift before deciding that cleaning is required.
Avoid. Conditioner, polish, adhesive lint roller and brushing one small circle until it becomes lighter.
Stop condition. Escalate when nap is missing, bonded by an earlier product or accompanied by an absorbed stain.
Open the full field guide
12Suede or split suede
Clothing color transfer
- Finish
- Dyed nap without smooth topcoat
- Application
- Seating insert
- Difficulty
- High
What to observe. Foreign color follows contact zones while the nap remains directional. Rubbing may move both deposit and original dye.
Least-risk next step. Identify garment and surface, test a specialist method on a retained sample if available, and preserve an untreated comparison.
Avoid. White-leather cleaner, wet wipes, vigorous circular scrubbing and judging color while damp.
Stop condition. Stop at original-dye transfer or broad shade change and use a napped-leather professional.
Open the full field guide
13Corrected-grain leather
Pale topcoat abrasion
- Finish
- Embossed pigment and topcoat
- Application
- Sofa front rail
- Difficulty
- Professional color work
What to observe. A uniform printed grain remains around a lighter rub. The area is stable and closed, but gloss and color differ from adjacent finish.
Least-risk next step. Confirm that soil is removed, assess coating stability and use a professional flexible color sample matched for grain and sheen.
Avoid. Sanding away the embossed pattern and applying a thick opaque patch that creates a smooth island.
Stop condition. Switch to repair when the substrate is exposed, weak or opening rather than merely pale.
Open the full field guide
14Corrected or pigmented leather
Short sharp scratch
- Finish
- Printed automotive coating
- Application
- Door insert
- Difficulty
- Medium
What to observe. The line has a defined edge and different depth along its length. It remains away from controls and does not open under ordinary flex.
Least-risk next step. Map surface scuff versus cut under raking light and prepare a representative color-and-flex test before any visible repair.
Avoid. Probing with a blade, broad solvent wiping and filling a surface scuff as though it were a structural tear.
Stop condition. Refer when material identity is uncertain, coating transfers or the line reaches a seam or bonded edge.
Open the full field guide
15Full-grain aniline leather
Uneven light fading
- Finish
- Transparent finish
- Application
- Window-side chair
- Difficulty
- High color-matching risk
What to observe. Exposed panels become lighter than folded or sheltered sections while pores and natural markings remain visible.
Least-risk next step. Map seasonal light, reduce exposure and define whether retained patina or controlled professional color integration is the goal.
Avoid. Expecting conditioner to replace color and recoloring one small patch without considering the whole chair.
Stop condition. Repair assessment is needed when fading is accompanied by brittleness, opening cracks or weakened seams.
Open the full field guide
16Full-grain pull-up leather
Light scuff and shifted color
- Finish
- Oil or wax pull-up effect
- Application
- Chair arm or leather bag
- Difficulty
- Medium
What to observe. Color lightens as the leather bends and some marks soften when oils and waxes redistribute within the intact surface.
Least-risk next step. Confirm pull-up behavior on a hidden intact section and use only the maker-approved care path for that article.
Avoid. Pigmented spot paint, aggressive degreasing and forcing every natural mark toward uniform color.
Stop condition. Treat as damage when an edge opens, fibers lift or the mark does not remain within the intact surface.
Open the full field guide
17Coated split leather
Peeling or delamination
- Finish
- Polymer coating over split layer
- Application
- Seating panel
- Difficulty
- Replacement often more credible
What to observe. A surface film lifts from a fibrous lower layer, often at a flex point. Loose edges can expand beyond the first visible patch.
Least-risk next step. Stop friction, preserve fragments for identification and obtain a panel-level assessment of surrounding adhesion and strength.
Avoid. Conditioner, household glue on the visible face and coating only the loose edge while adjacent film remains unstable.
Stop condition. Move to panel or cover replacement when lifting is broad, recurrent or supported by weak surrounding material.
Open the full field guide
- Finish
- Exposed fibrous nap
- Application
- Decorative upholstery panel
- Difficulty
- Specialist
What to observe. The tear edge is fibrous and can stretch. Nap makes a surface fill or color transition more visible than on smooth coated leather.
Least-risk next step. Map access, load and remaining edge strength; keep the panel unloaded while a backing or replacement option is assessed.
Avoid. Trimming fibers, saturating the nap with adhesive and assuming a smooth-leather filler will remain invisible.
Stop condition. Choose replacement when edges cannot meet without force or surrounding split material continues to stretch.
Open the full field guide
19Coated vinyl
Heat cracking or edge shrinkage
- Finish
- Molded or wrapped polymer skin
- Application
- Vehicle dashboard
- Difficulty
- Construction-dependent
What to observe. Cracks follow high-exposure areas, and the panel may pull at a bonded edge. Printed grain does not confirm leather.
Least-risk next step. Identify construction and panel access from vehicle information, reduce exposure and obtain a trim-system repair assessment.
Avoid. Leather conditioner, cutting a bubble, strong solvent and adhesive work around controls or safety systems.
Stop condition. Refer when layers separate, fit changes, controls are involved or the substrate remains uncertain.
Open the full field guide
20Coated vinyl
Ink or dark transfer
- Finish
- Uniform protective coating
- Application
- Dining or office chair
- Difficulty
- Medium
What to observe. A sharp foreign-color mark sits on an otherwise uniform surface. Strong rubbing risks changing gloss before the deposit lifts.
Least-risk next step. Consult current maker guidance, run the smallest hidden representative test and judge both color and sheen after drying.
Avoid. Acetone, marker, abrasive sponge and a cleaner selected from a leather label when the substrate is vinyl.
Stop condition. Stop when the coating softens, color moves or the mark sits across cracked material.
Open the full field guide
21Bonded leather composite
Flaking and peeling
- Finish
- Surface layer over bonded fiber base
- Application
- Sofa or desk chair
- Difficulty
- Replacement planning
What to observe. Thin surface fragments release across repeated flex zones, revealing a different composite layer beneath.
Least-risk next step. Confirm the material specification, limit use and compare local repair with panel or complete cover replacement.
Avoid. Calling the symptom dryness, adding oil and painting over a broad unstable layer.
Stop condition. Do not promise a durable invisible spot repair when peeling continues beyond the visible boundary.
Open the full field guide
22Unknown coated surface
Tack after cleaner or dressing
- Finish
- Leather, vinyl or earlier coating unconfirmed
- Application
- Furniture touch point
- Difficulty
- High uncertainty
What to observe. The area stays sticky when dry, attracts lint or leaves residue. Earlier products and substrate are not known.
Least-risk next step. Stop all additions, preserve containers, isolate the area from use and document exactly what was applied and removed.
Avoid. Sealing the tack under finish, adding powder or oil and trying successive solvents.
Stop condition. Use a qualified surface assessment before further chemistry or adhesion-dependent repair.
Open the full field guide
23Pigmented perforated leather
Liquid entering perforations
- Finish
- Automotive protective finish
- Application
- Heated or ventilated car seat
- Difficulty
- System-sensitive
What to observe. Surface liquid disappears through holes or seams and dampness may extend beyond the visible mark toward foam or seat systems.
Least-risk next step. Blot without flooding, keep the seat unused, record substance and amount, and seek vehicle-specific advice for the assembly.
Avoid. Heat gun, wet vacuum without system guidance, cleaner poured into perforations and electrical disassembly.
Stop condition. Professional inspection is required when liquid reaches electrical, heating, ventilation or restraint-related components.
Open the full field guide
24Mixed leather and vinyl upholstery
Open seam between materials
- Finish
- Several visually matched coated surfaces
- Application
- Aged sofa
- Difficulty
- Upholstery repair
What to observe. Stitch holes stretch differently on each side, and one panel may reveal a textile-backed synthetic substrate while the other remains leather.
Least-risk next step. Map every panel material, support the seam unloaded and assess whether holes, thread, filling or panel edges have failed.
Avoid. One cleaner or adhesive across both materials, pulling thread tight through torn holes and hiding the junction under color.
Stop condition. Move to reupholstery scope when edges are weak, support has shifted or access requires opening the cover.
Open the full field guide