Scope a vehicle job • Automotive Leather
When does a car seat need repair?
A car seat needs more than cosmetic care when cracks, tears, loose seams or damaged support change how the cover moves.
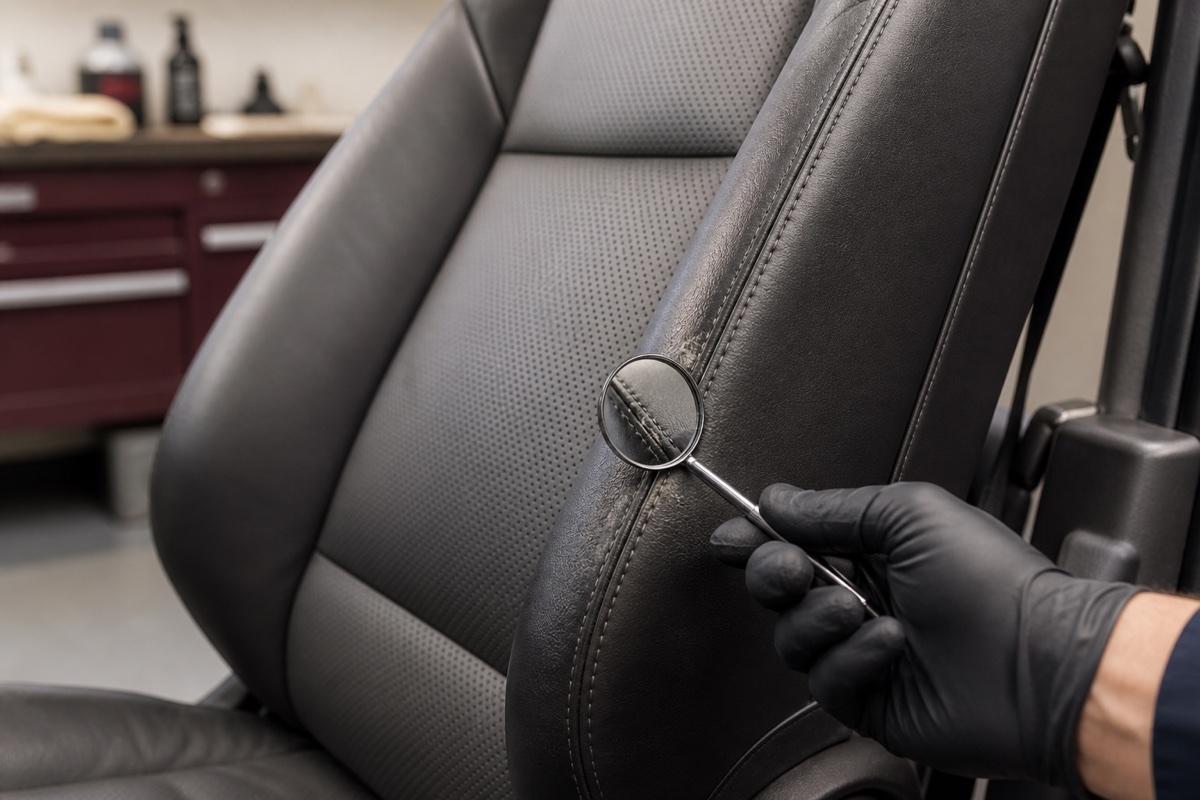
Map the damage against bolsters, seams, perforations, heating elements and airbags. Note whether the problem is local or repeated across the cabin.
An accurate brief also includes the vehicle’s use, the target appearance and any earlier recoloring. Unknown products can make later matching harder.
When structure or restraint systems are involved, stop at documentation and arrange qualified inspection.
Repair begins with movement, not appearance
The same behaviour shows up in another setting, described in set-out times approved containers.
A seat can look worn yet remain structurally sound, or look tidy while a loose seam and compressed foam increase stress beneath the cover. Watch the bolster during ordinary entry and exit. Note whether a crack closes at rest, whether the cover shifts over the foam, and whether the seat support feels different from the passenger side. Movement reveals the load path that a still close-up cannot show.
Separate removable soil, finish abrasion, open material, seam failure and support change. Each is a different job. A controlled clean may address clothing transfer; flexible color work may address stable finish loss; a split may need backing and fill; damaged foam or stitching can require the cover to be opened. Calling all of them "seat restoration" hides the sequence and makes estimates difficult to compare.
Map the systems around the damaged panel
Record perforations, heating or ventilation zones, occupancy features, powered adjustments and any airbag marking or seam. Do not assume the visible leather panel is isolated from those systems. A repair near a deployment seam or sensor requires vehicle-specific knowledge and qualified workmanship. General editorial guidance should stop at photographs, documentation and referral when safety equipment enters the scope.
Check the vehicle manual and part information before removing trim. Do not probe beneath the cover, disconnect wiring or open a labelled seam to improve a cosmetic inspection. The seat crack and transfer guide shows how much can be learned from surface pattern, light and gentle unloaded flex without dismantling the assembly.
Write the repair brief around a panel map
Photograph the complete cabin so color and sheen relationships remain visible. Then photograph every damaged panel with scale and its neighboring seams. Note prior recoloring, unknown dressings, body-shop work, frequent sun exposure and how the vehicle is used. A daily driver's target may prioritize stable, integrated wear; a preserved classic may prioritize original material and reversible decisions. Neither goal should be assumed.
Ask whether the repairer proposes cleaning, surface preparation, flexible filling, backing, recoloring, panel replacement or retrimming. Request a stop point if hidden damage appears. The recoloring versus replacement guide helps frame appearance, strength and material matching as separate variables rather than a single price choice.
Escalate before the failure spreads
Seek inspection when a split opens under normal load, a seam pulls through its holes, foam is visible, the cover moves independently, a sharp edge is exposed or the seat's support changes. Also stop when cleaning moves color or leaves tackiness. Continued sliding across a weakened bolster can lengthen a tear and reduce the clean edge available for a controlled repair.
Judge the finished work with the seat adjusted through its normal range and the surface fully cured. Look for secure seams, consistent grip, unobstructed perforations and a color transition that works across the cabin. Keep the method, materials and date in the service record. That evidence will make the next maintenance decision faster and more accurate.
Source note: Editorial method. Accessed August 25, 2026.